
The Saltwater Magazine for Gulf Coast Fishing!
FISHING FORECASTS | FISHING CALENDARS | ARTICLES | SUBSCRIBE

FALL 2017
Search Gulf Coast Fisherman's
Web Site
Past articles, specific
places or fish, etc.
Tying the Snell Knot
by Patrick Lemire
![]()
![]()
| CURRENT
MOON lunar phases |
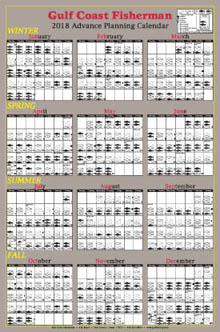
Advance Planning Calendar
Snell? Yes!...
The snell, another of those knots that are largely associated with billfishing by many, is actually an easily tied knot that has many other offshore as well as inshore fishing applications. The snell knot was developed in Great Britain many years ago for attaching a line to a hook. Back in those times, most hooks had no eyes. The snell knot was the solution; it worked then, just as it does today.
The use of the snell knot for connecting mono to just about any size or type hook commonly used in our assorted fisheries will be covered here. It's a knot that will give the most holding power at the hook, whether it's a ling, amberjack, big snapper or grouper that's on it. Whatever the line strength, the snell connection will hold it all. It's 100% knot strength provides you with confidence that you've eliminated at least one potential weak point in your rigging.
As I've said in the past concerning knots, with a little practice you will be able to tie this knot a lot faster than the time it takes to read how to tie it. Put it on your "Mono Knots to Use" list; it needs to be there.
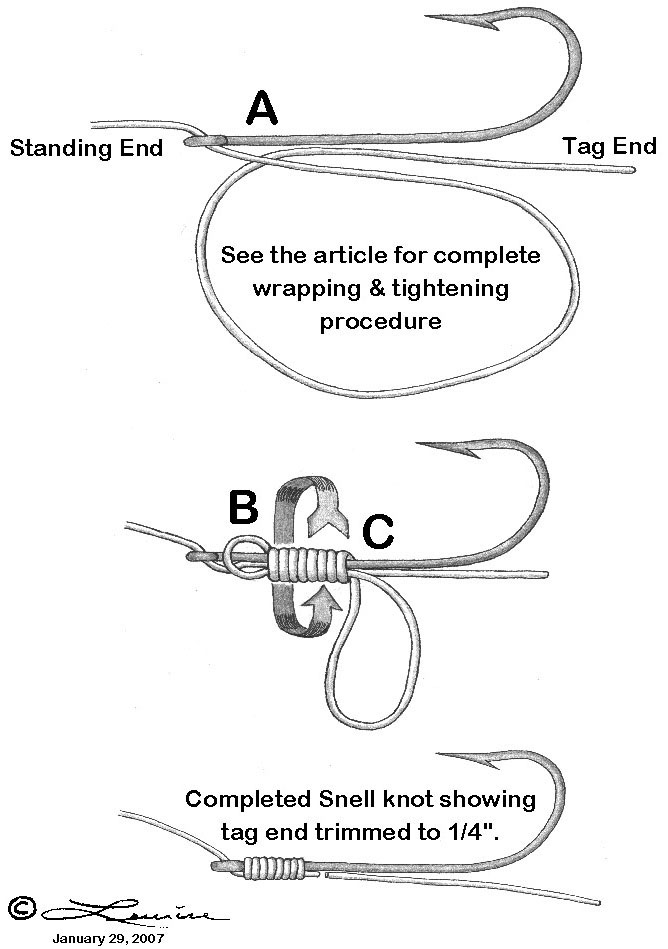
To form and tie the snell knot, first insert the mono through the hook's eye from the bend side of the hook, as shown in the upper view of the illustration. Pull about 10" of mono through, form a loop as shown. Now, firmly pinch the mono against the hook eye and shank at "A" between your left thumb and forefinger. Note that the tag end is laying behind the standing end. The second view shows the right side of the loop being wound in tight coils over the hook's bend with a circular and twisting motion around the hook's shank and the two strands of mono lying below it. Work down the shank toward the bend end of the hook while holding the coils in place at "B". After making 8 to 10 wraps and holding tight at "C", in order to prevent unraveling of the coils, pull the standing end slowly in order to pull the entire loop under the coils and snug. If all looks good, no mis-crossed coils, etc., tighten the snell by holding the hook firmly and carefully and pulling snug with the standing end. Next, give the tag end a final tightening pull, eliminating any slack it has in it near the hook eye. With one last pull on the standing end, the snell knot is complete except for cutting the tag end to about 1/4" long.
Some other important points when forming and tightening this and any other mono knot: Lubricate the mono with saliva after a bit of snugging down, but before tightening the wraps. Watch out for the hook points, as they will also penetrate your facial parts. This lubricating with saliva is an important part of the simplicity of mono knot tying. After a look at the wraps and the final tightening, if your knot doesn't look like a mini "work of art" as it should, cut it off and start again. When you're satisfied that all is O.K., cut the tag end to around 1/4". These basic knot tying rules have been around since shortly after mono fishing lines were invented, and are still true today. Using gloved hands to tighten mono knots isn't a bad idea either, especially when using heavy mono and the associated hard pull needed to set those knots securely. Always keep in mind that no hook has a brain - we must supply that - hooks will penetrate you much easier than they will most of the fish out there. With every move, when tying up, keep that hook point in mind.
Note on the illustration the direction of the mono through the hook's eye. This placement will aid in rotating your hook into penetration as the line comes tight. The opposite direction through the eye will have a negative effect on the hook point's penetration into your target it's just not loading the hook point properly. The snell can also be tied without the mono going through the eye, laying parallel with the hook shank. It's usually tied this way in billfishing applications on trolling lures; this virtually gives a direct pull for a surer hookset on a trolled lure. For the applications I'm addressing here, ling, red snapper, grouper, amberjack, dolphin, etc., the through the eye, as illustrated, is what works best when using dead, live, chunk or strip baits.
Use caution when doing a pull test or the final tightening of any knot. Be sure the cord, etc., that you've hooked into which is attached to a stationary object is stronger than the mono the knot is tied into. Your tether breaking will have your hook coming back at you in the direction of pull not a good thing.
Like any new knot, tie several up and give them a good pull test. This gives you confidence in being able to tie it up when fishing and will let you fish it without worry. Eliminating worry points when the "big one" is on your hook is eliminating distractions which can affect how you conduct your fish fight.
With my use over many years, including drag settings at times of over
one half of the line's rated strength, along with aggressive rod pumping
and reel winding, I've never had a snell knot connection failure. The snell
is indeed a worthy addition to your fishing arsenal, so I say "Snell?
Definitely Yes!".